Personnel Information Management
Personnel Information includes personal information, contact information, identification details, organizational information, authorized devices, and termination details.
Personnel Information
Personnel Information Card
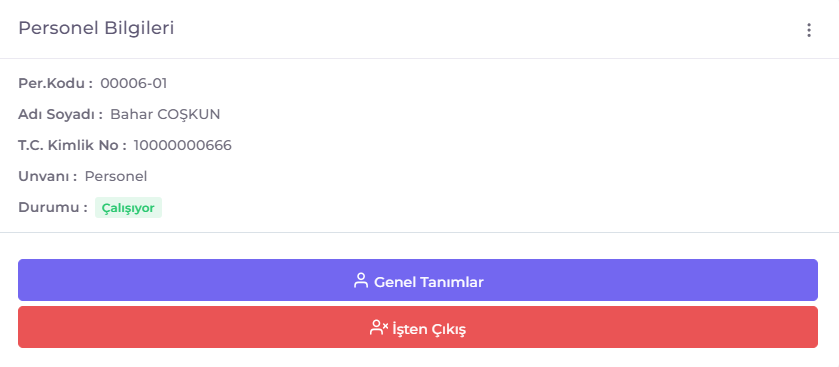
- Per. Code: The personnel code of the registered personnel.
- Name and Surname: The name and surname of the registered personnel.
- T.C. Identity No: The Turkish Republic Identity number of the registered personnel.
- Title: The title of the registered personnel.
- Status: The employment status of the registered personnel.
- Working: The employee is actively employed.
- Terminated: The employee's employment has been terminated.
- General Definitions Button: Switches to the General Definitions tab in the Personnel Information Form.
- Termination Button: Switches to the Termination tab in the Personnel Information Form.
- Mobile Activation Button: Opens a window for Mobile Phone Verification. (See Mobile Activation Process)
- Action Menu: Accessible by clicking the icon in the upper right corner of the Personnel Information Card. The following pages can be accessed for the selected personnel from the Action Menu:
User Information Card
- Username: The username the personnel will use to log into the application.
- Role: The user's user role.
- Action Menu: Accessible by clicking the icon in the upper right corner of the User Information Card. The following user actions can be performed for the selected personnel from the Action Menu:
- Detail: Opens the user information editing form for the personnel.
- Suspend: Suspends the personnel's user account.
- Delete: Deletes the personnel's user account.
Personnel Information Form
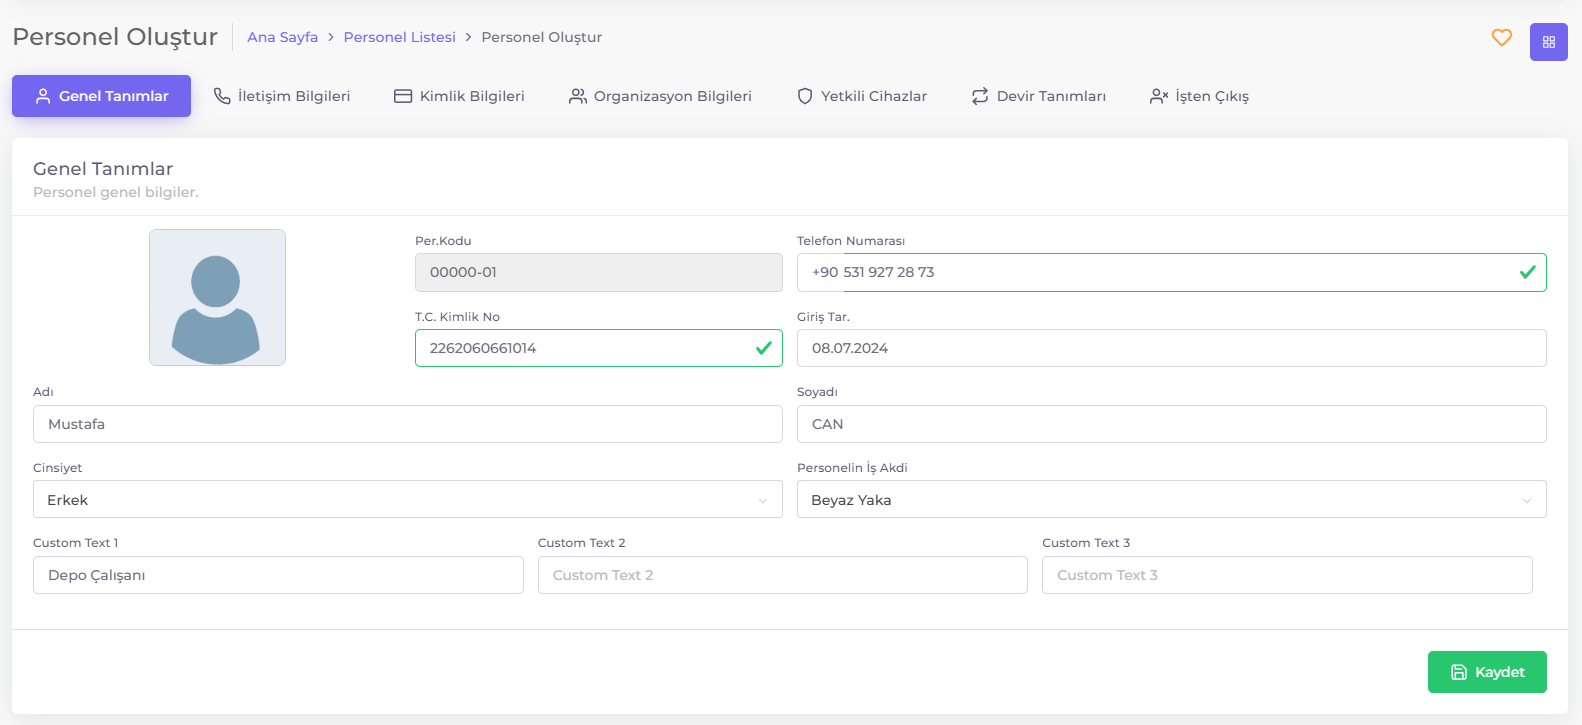
1. General Definitions
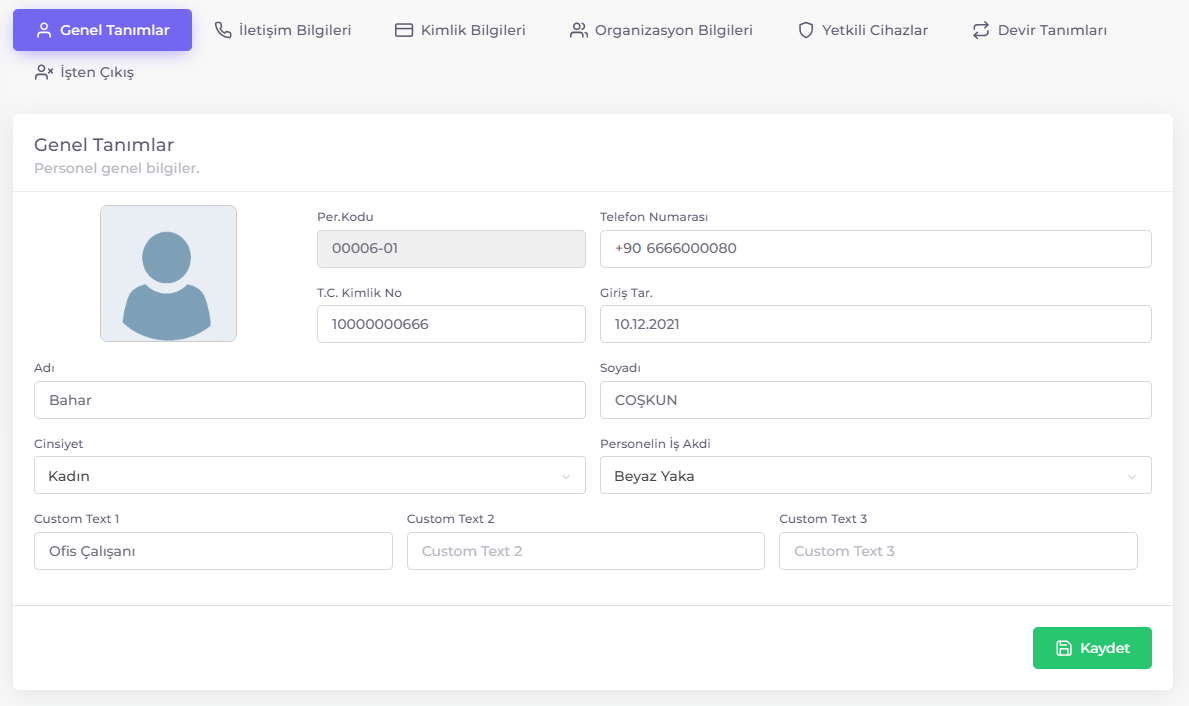
- Per. Code: The unique code of the personnel.
- If "Calculate Personnel Code Automatically" is defined in Company Settings, the system will automatically assign a personnel code.
- Phone Number: The personnel's phone number.
- The phone number should be in the format "5xxxxxxxxx" (10 digits).
- T.C. Identity No: The personnel's Turkish Republic Identity number.
- Start Date: The date the personnel started employment.
- First Name: The first name of the personnel.
- Last Name: The last name of the personnel.
- Gender: The gender of the personnel.
- Employment Contract: The employment contract of the personnel. (See Contract Management)
- Custom Text 1-3: Custom fields for additional information. (See Custom Field Titles)
2. Contact Information
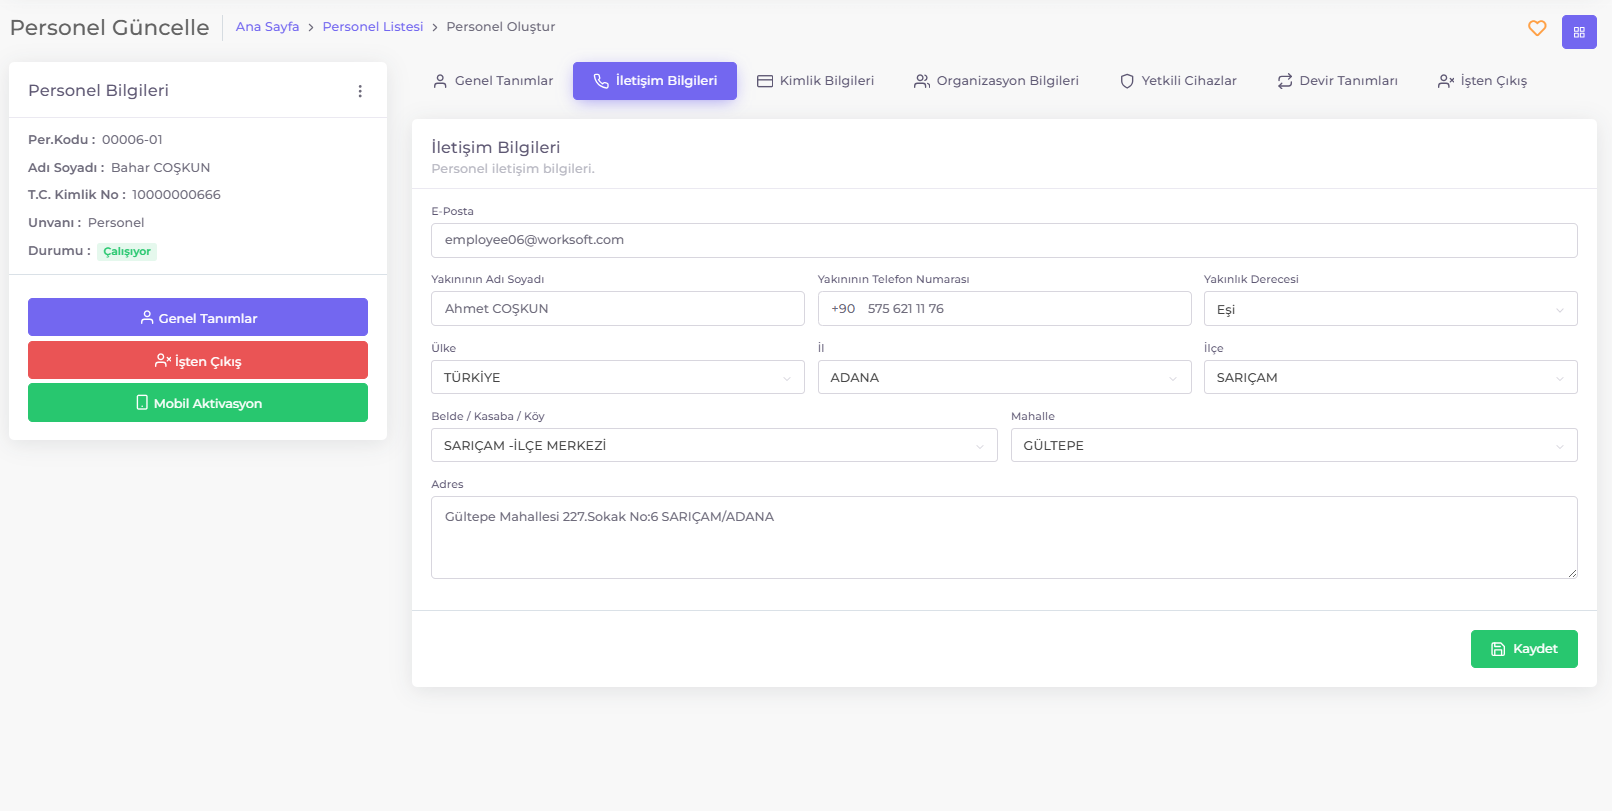
- Email: The personnel's email address.
- Relative's Name: The name of a relative or emergency contact of the personnel.
- Relative's Phone Number: The phone number of the personnel's relative.
- Relationship: The relationship between the personnel and the relative.
- Country: The country of the personnel.
- City: The city of the personnel.
- District: The district of the personnel.
- Town/Village: The town or village of the personnel.
- Address: The detailed address of the personnel.
3. Identification Details
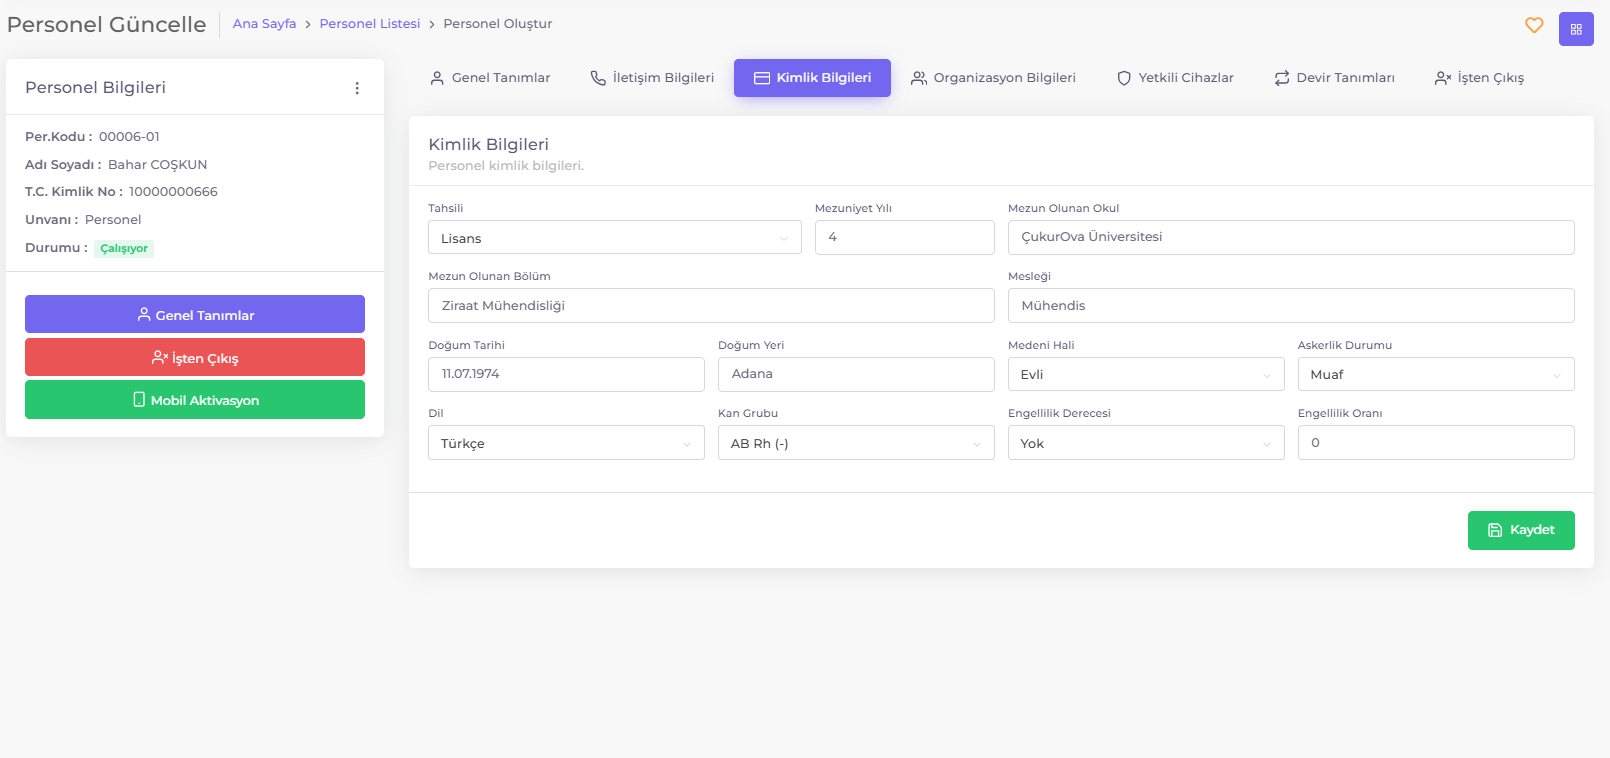
- Education: The education level of the personnel.
- Graduation Year: The year the personnel graduated.
- Graduated School: The school from which the personnel graduated.
- Graduated Department: The department from which the personnel graduated.
- Profession: The profession of the personnel.
- Date of Birth: The date of birth of the personnel.
- Place of Birth: The place of birth of the personnel.
- Marital Status: The marital status of the personnel.
- Military Status: The military status of the personnel.
- Language: The language proficiency of the personnel.
- Blood Type: The blood type of the personnel.
- Disability Degree: The degree of disability of the personnel.
- Disability Rate: The disability rate of the personnel.
4. Organizational Information
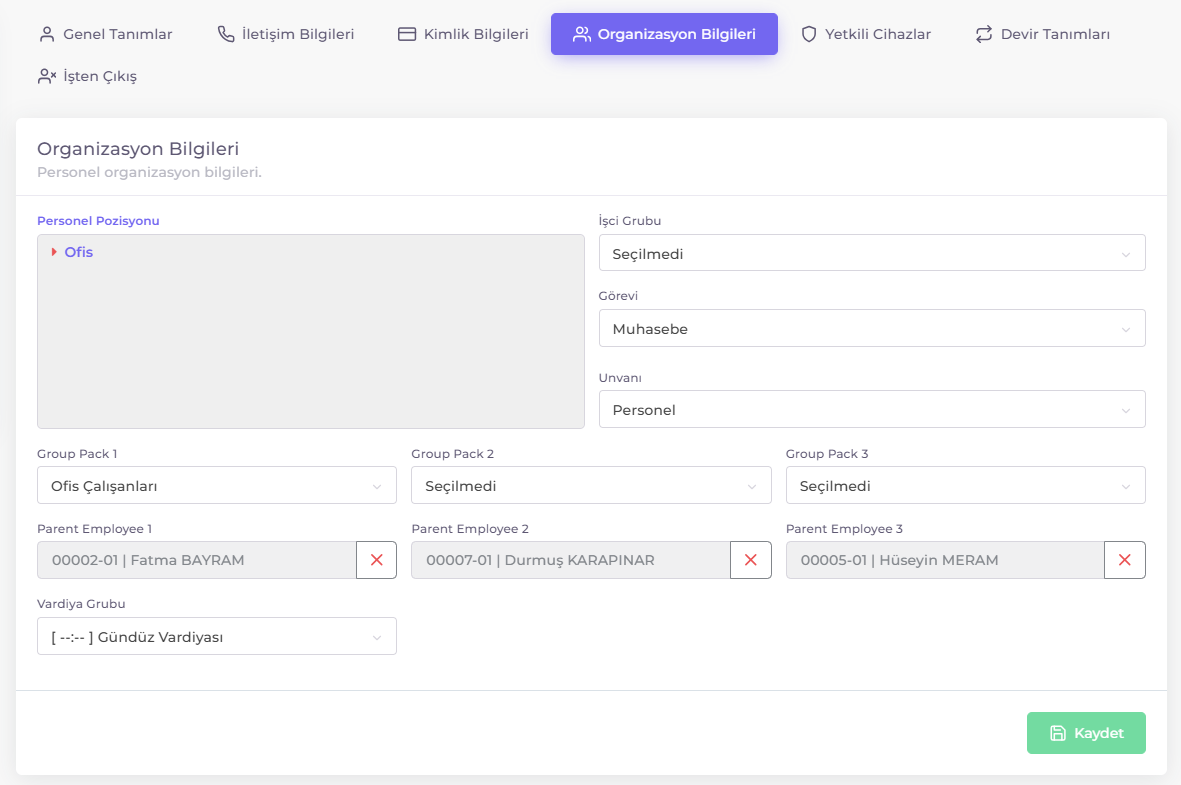
- Personnel Position: The position of the personnel within the organization. (See Company Structural Units)
- Worker Group: The worker group of the personnel. (See Company Dictionary)
- Duty: The duty of the personnel. (See Company Dictionary)
- Title: The title of the personnel. (See Company Dictionary)
- Group Pack 1-3: The group of the personnel. (See Personnel Groups)
- Parent Employee 1-3: The superiors of the personnel. (See Company Information)
- Shift Group: The shift group of the personnel. (See Company Dictionary)
5. Authorized Devices
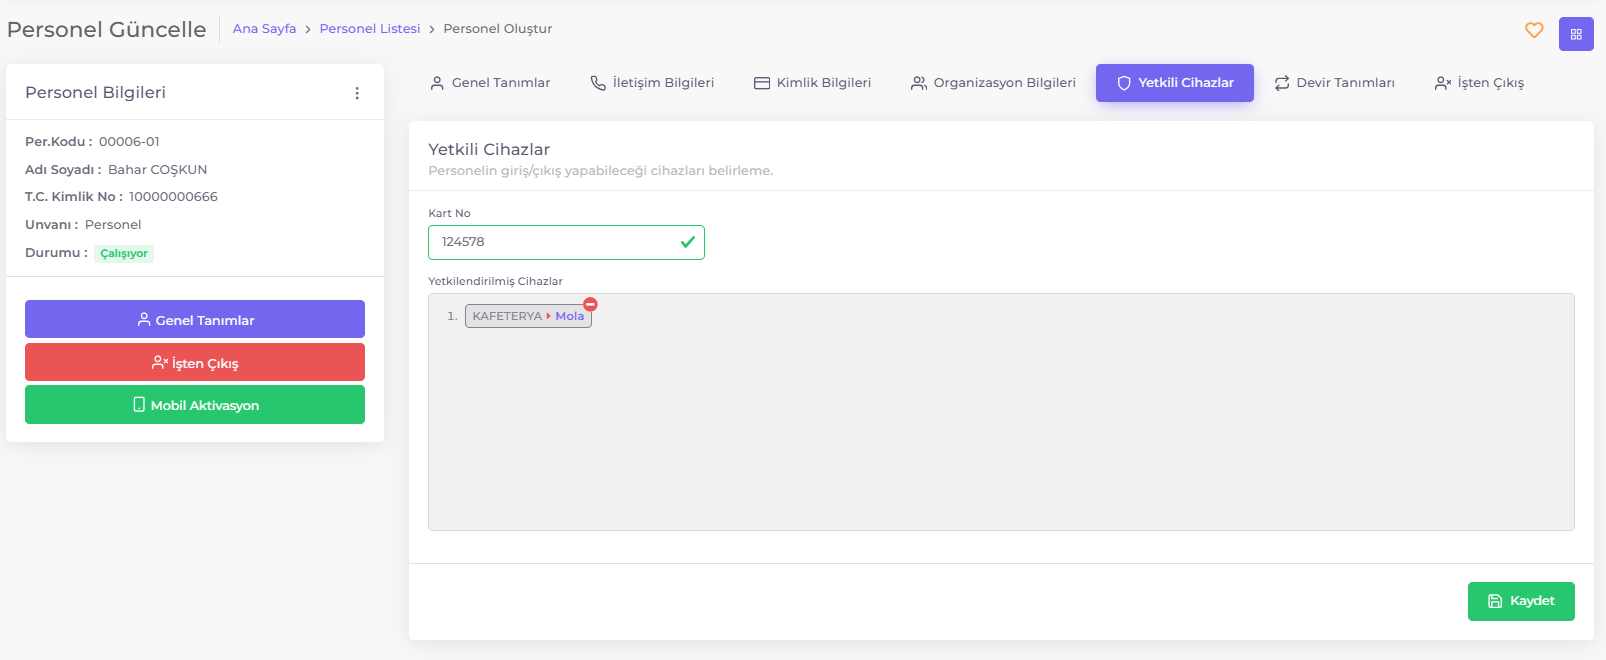
Authorize the devices that the personnel will use or access. Skip this section if authorized entry is not applicable.
- Card No: Proximity or MiFare card number
- Authorized Devices: List of devices authorized for use.
6. Shift Definitions

- Seniority Date: Personnel's seniority date.
- Used as a reference for calculating annual leave entitlements.
- Past Used Annual Leave: Annual leave used by the personnel before being recorded in the system.
7. Termination Information
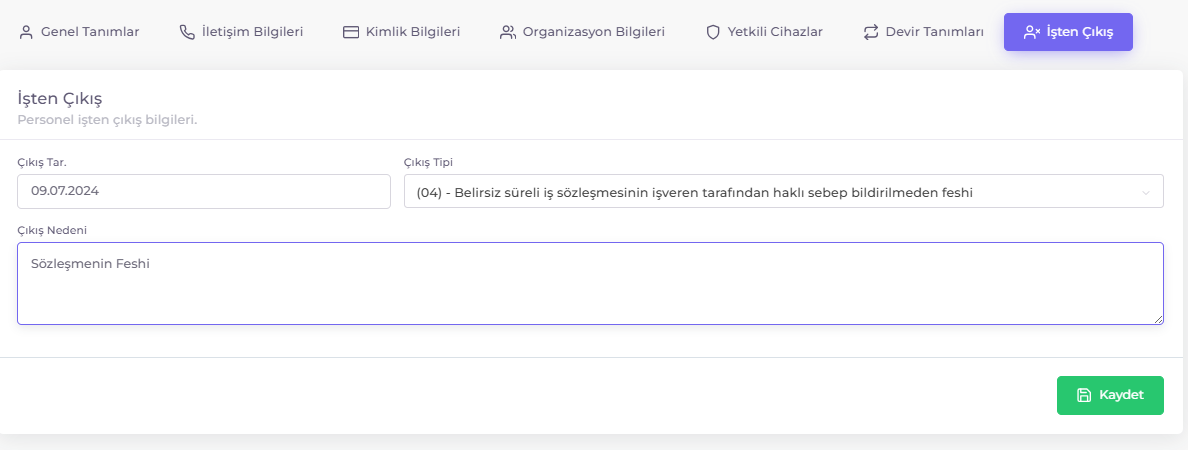
- Termination Date: Date of termination from the job.
- Termination Type: Type of job termination.
- Termination Reason: Reason for job termination.
Adding a New Personnel
- Add New Record:
- Click on the "+ Add New Record" button in the top right corner of the Personnel List screen.
- Fill in the necessary information through tabs such as general definitions, contact information, identification information, organization information, and authorized devices on the "Personnel Information" screen that opens.
- General Definitions:
- Enter basic information such as the personnel's name, surname, gender, personnel code, phone number, ID number, entry date, seniority date, etc. in this tab.
- Select the Personnel Employment Contract.
- You can also fill in additional information defined under custom field titles.
- Contact Information:
- Enter the personnel's email address, address details, and contact information of their relative.
- Identification Information:
- Enter identification details such as ID number, date of birth, place of birth, marital status, etc.
- Organization Information:
- Select the personnel's position in the organization, labor group, duty, title, and the shift system they belong to from within the organization.
- Choose the relevant superiors under related personnel titles.
- Authorized Devices:
- Enter the Proximity or MiFare card number if available.
- Authorize the devices the personnel will use or access.
- Click on the Authorized Devices field.
- Select the Device(s) you want to authorize from the list.
- Click the OK button.
- Click the Save button.
- Skip this section if authorized entry is not applicable.
- To remove device authorization, follow these steps:
- The device(s) authorized for the personnel will appear as Location > Device name in the Authorized Devices list.
- Click on the icon in the top right corner of the device name you want to remove.
- Click the Save button.
- Saving:
- After entering all the information, click the "Save" button in the bottom right corner of the screen.
Mobile Activation Process
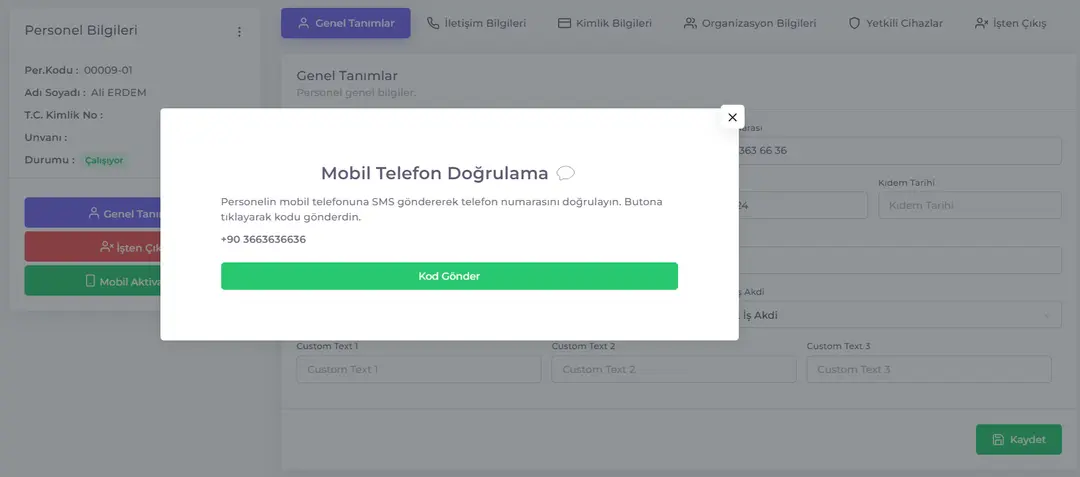
To grant access to the Mobile Application for the saved personnel, the personnel's phone number must be verified and they must have a personnel password. This requires the Mobile Activation process to be completed.
You can complete the Mobile Activation Process by following these steps:
- Click on the Personnel List menu.
- Click on the Edit icon in the Actions column of the relevant Personnel row.
- Click on the Mobile Activation button on the Personnel Information Card.
- The Mobile Phone Verification window will open.
- Click on the Send Code button to send an SMS to the personnel's mobile phone and obtain the verification code.
- Enter the verification code from the message sent to the personnel's registered phone number to complete the activation process.
Once you have successfully completed the Mobile Activation Process, the personnel will receive user credentials containing the password and the application installation link.
Terminate Personnel
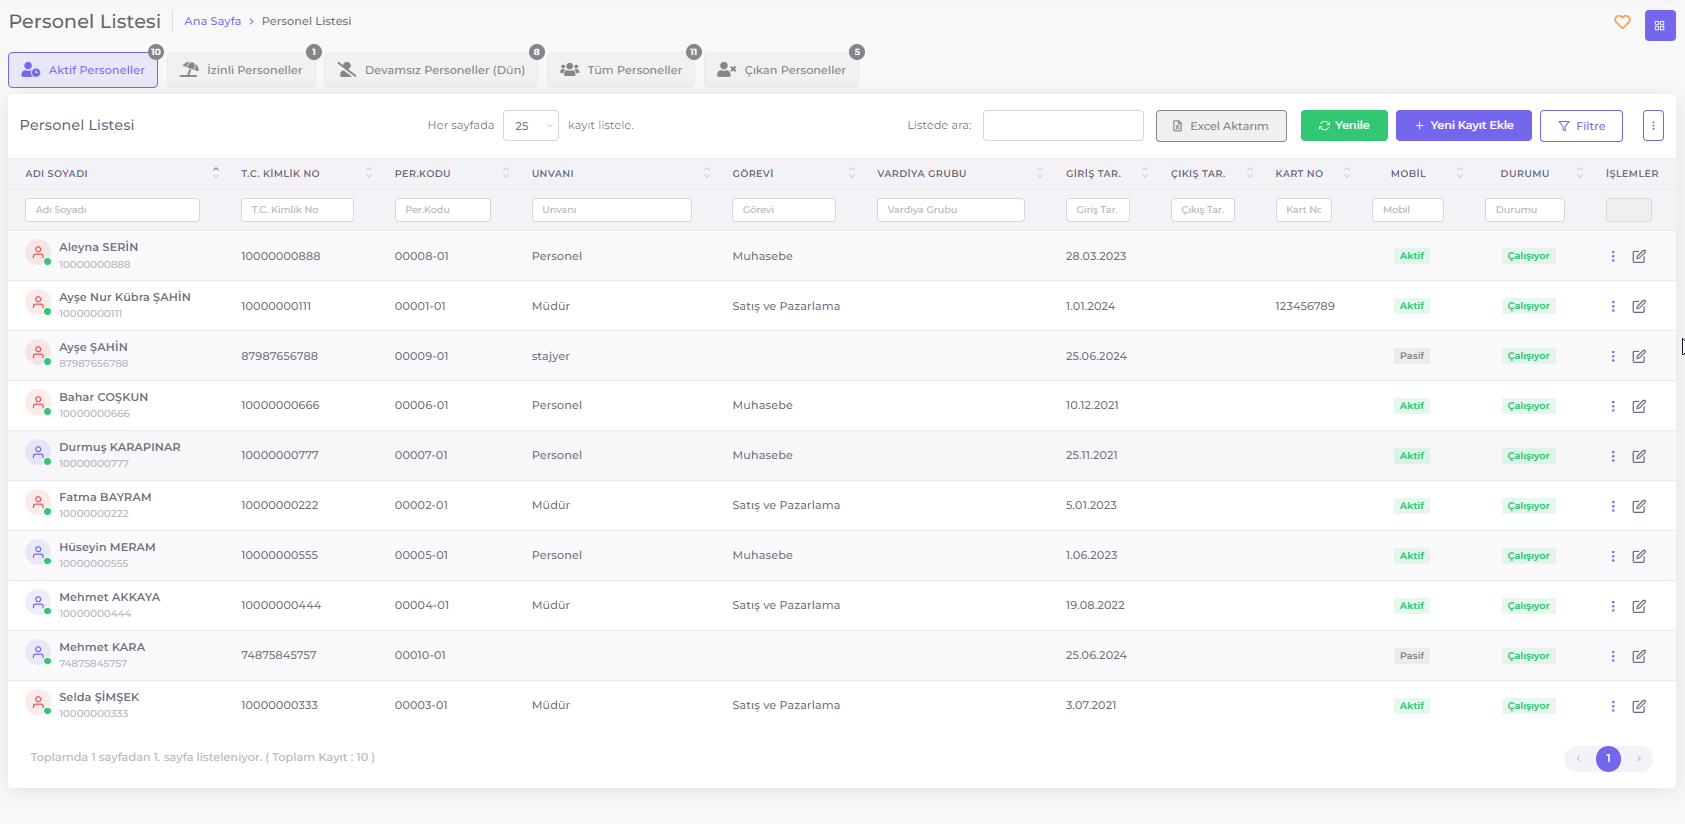
By terminating the personnel, you can stop all activities of the personnel in the system. Follow these steps to terminate personnel:
- Go to the Personnel List page.
- Click on the Edit icon in the relevant record row of the personnel you want to terminate.
- The Personnel Information form will open.
- Go to the Termination tab in the form.
- Enter the Termination Date, select the Termination Type, and write the Termination Reason.
- Click the Save button to complete the personnel termination.
Copying Terminated Personnel Information
If a terminated personnel needs to re-enter employment, a new personnel record must be created for this personnel. When a terminated personnel will re-enter employment, the personnel information registered with the T.C. Identification number can be easily copied. Follow these steps:
- Click on the Add New Record button on the Personnel List page.
- Enter the T.C. Identification number of the terminated personnel in the T.C. Identification No field and press the Enter key on the keyboard.
- The Registered Personnel alert window will open.
- Click the Copy button in the pop-up window.
- The terminated personnel information will be copied to the New Personnel Information Form.