How It Works?
In this section, the operation process of our Personnel Management System (PMS) application will be explained summarily. Users will find roadmap-like tips on where and how to start, and they will become knowledgeable about the application from its configuration to administrative operations.
General Operation
The basic operation of the application is as follows: Company information is entered and necessary adjustments are made. Personnel records are created, and our PMS application records entries and exits at designated access and control points. These records are transmitted online to the PMS software and analyzed. As a result, continuity information such as employees' work entry-exit times, overtime, and leaves are securely stored. Performance, attendance, and salary calculations are easily performed at the end of the month.
Employees can use the mobile application to track shift schedules within the usage permissions you define, request leave, advances, and hourly leave. Additionally, information flow can be facilitated, and responsibilities can be delegated by authorizing some operations.
Our application is compatible with devices running Android, iOS, and HarmonyOS operating systems, making it easy to verify employees' location and identity information.
For a good start and continuation, our Step-by-Step Application Configuration recommendation is as follows.
Step-by-Step Usage
Enter Your Company Information
- Click on the Company Settings > Company Information menu.
- Enter complete information such as company name, email address, phone number, and complete your company profile.
- Manage other settings from the "Time Parameters," "Notifications," "SMS Account Information," and "Application Settings" tabs.
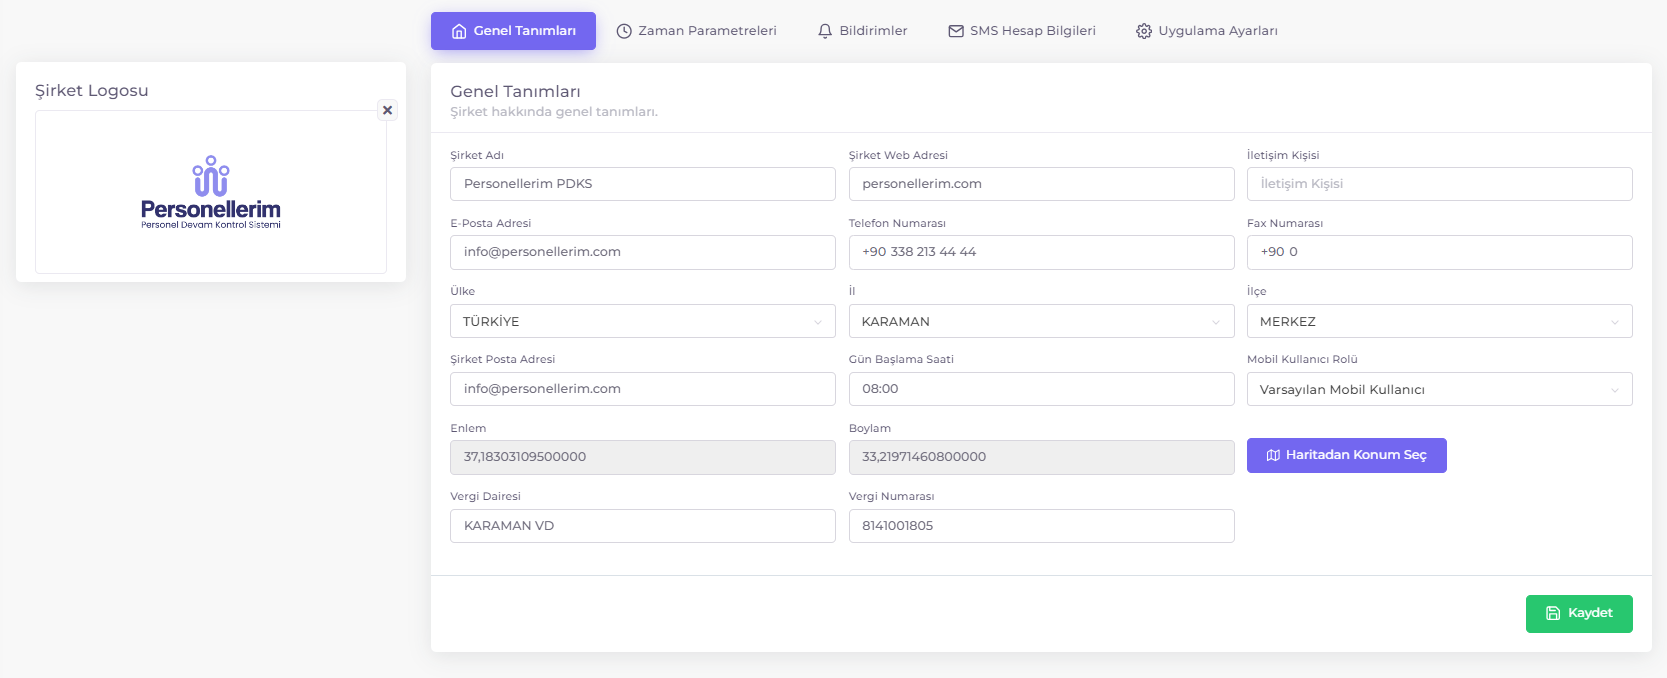
Define Your Employment Contracts
- Click on the Company Settings > Employment Contracts menu.
- Create employment contracts containing information such as working conditions, wage multipliers, and breaks.
- After adding employees to your created employment contracts, you can define them.
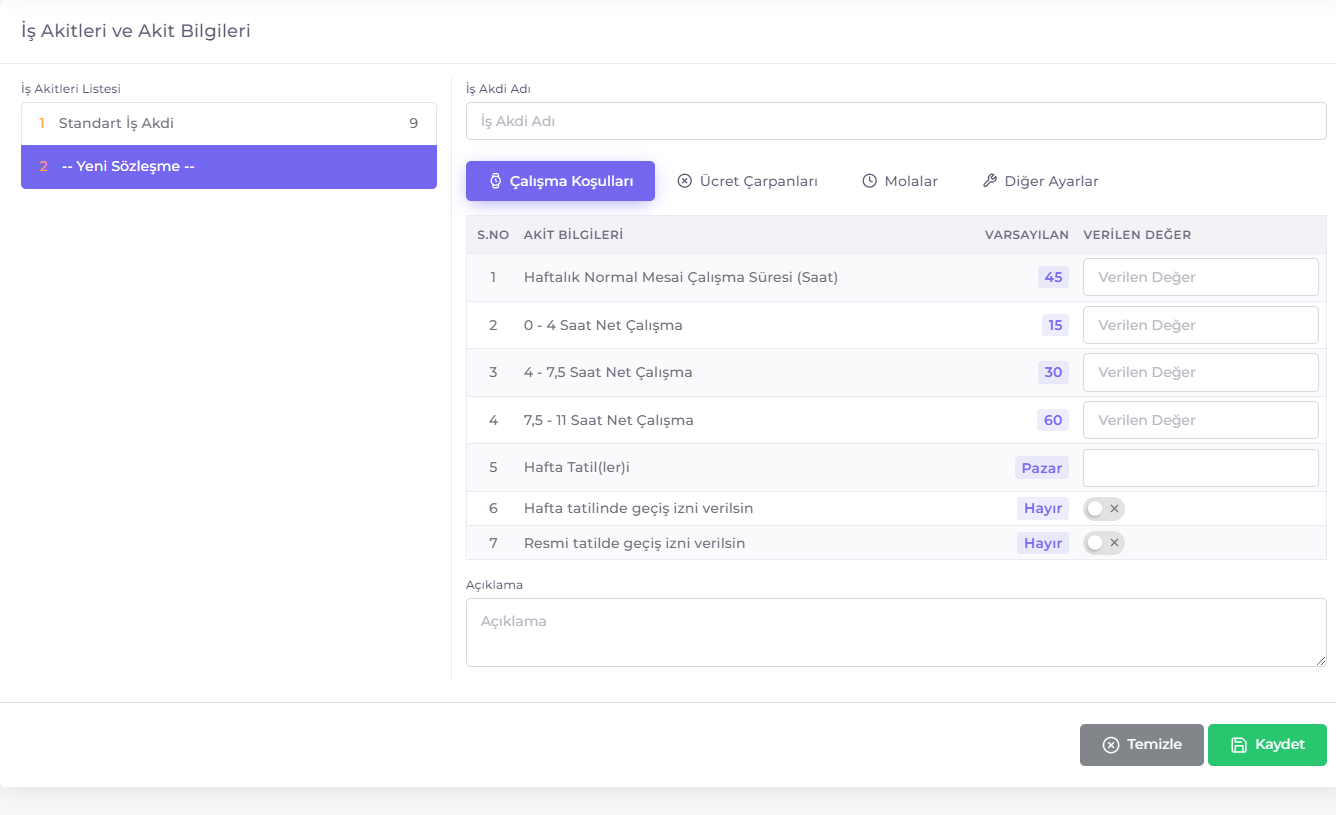
Create Your Company Structural Units
- Click on the Company Settings > Company Structural Units menu.
- Organize your company's structure by adding main structural units and subunits.
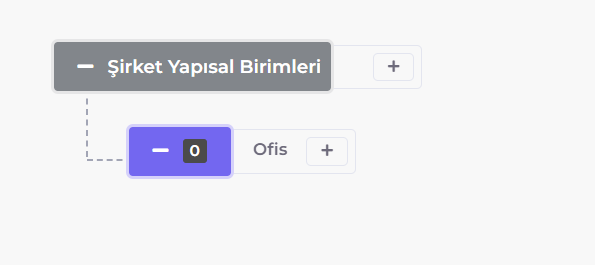
Create Your Company Dictionary
- Click on the Company Settings > Company Dictionary menu.
- Make definitions from sections such as "Roles," "Titles," "Worker Groups," "Advance Types," "Reward Types," "Penalty Types," and "Location Groups."

Create Personnel Groups
- Click on the Company Settings > Personnel Groups menu.
- You can add new personnel groups, edit existing ones, or delete them.

Create Locations and Devices
- Click on the Company Settings > Locations and Devices menu.
- Define the locations of your company and the devices used in these locations.
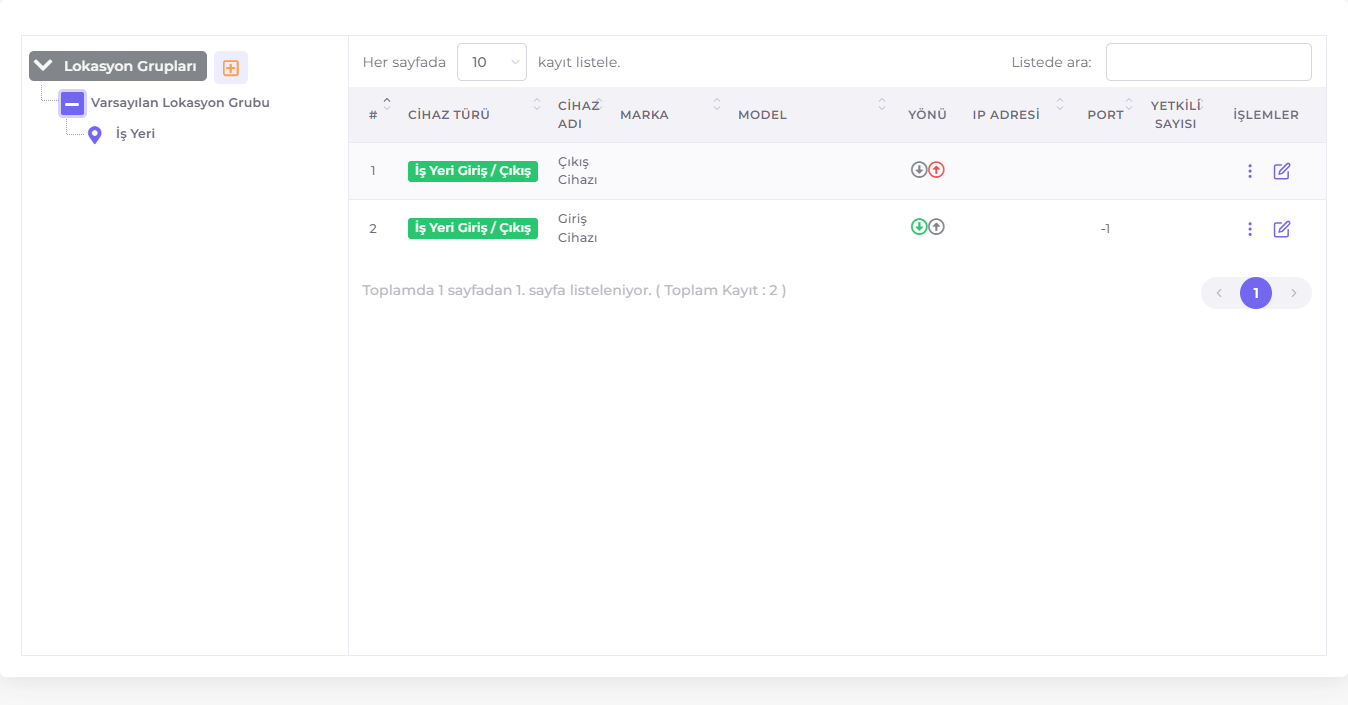
Define Shifts
- Click on the Company Settings > Shifts menu.
- Set up your employees' working hours by entering information such as shift name and start/end times.

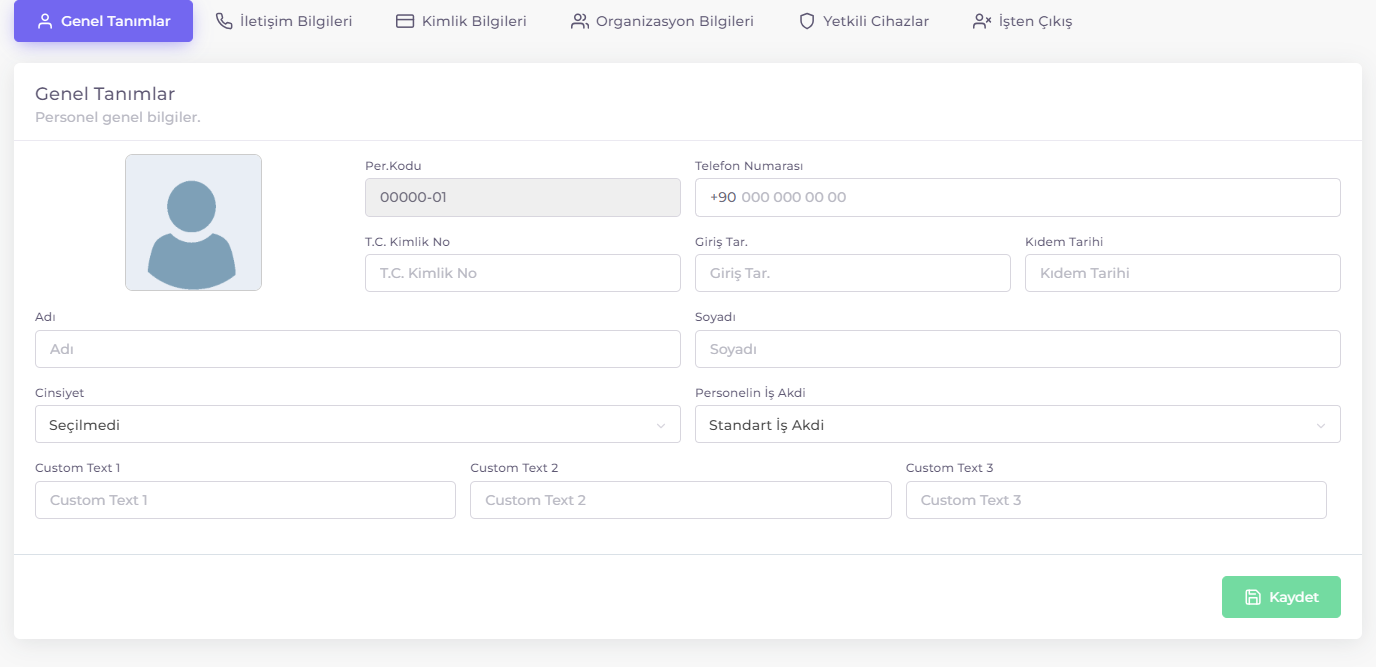
Create Personnel Records
- Click on Personnel List menu.
- Click the + New Record button on the opened page.
- Enter information about the employee in tabs such as "General Definitions," "Contact Information," "Identity Information," "Organization Information," "Authorized Devices," and "Termination."
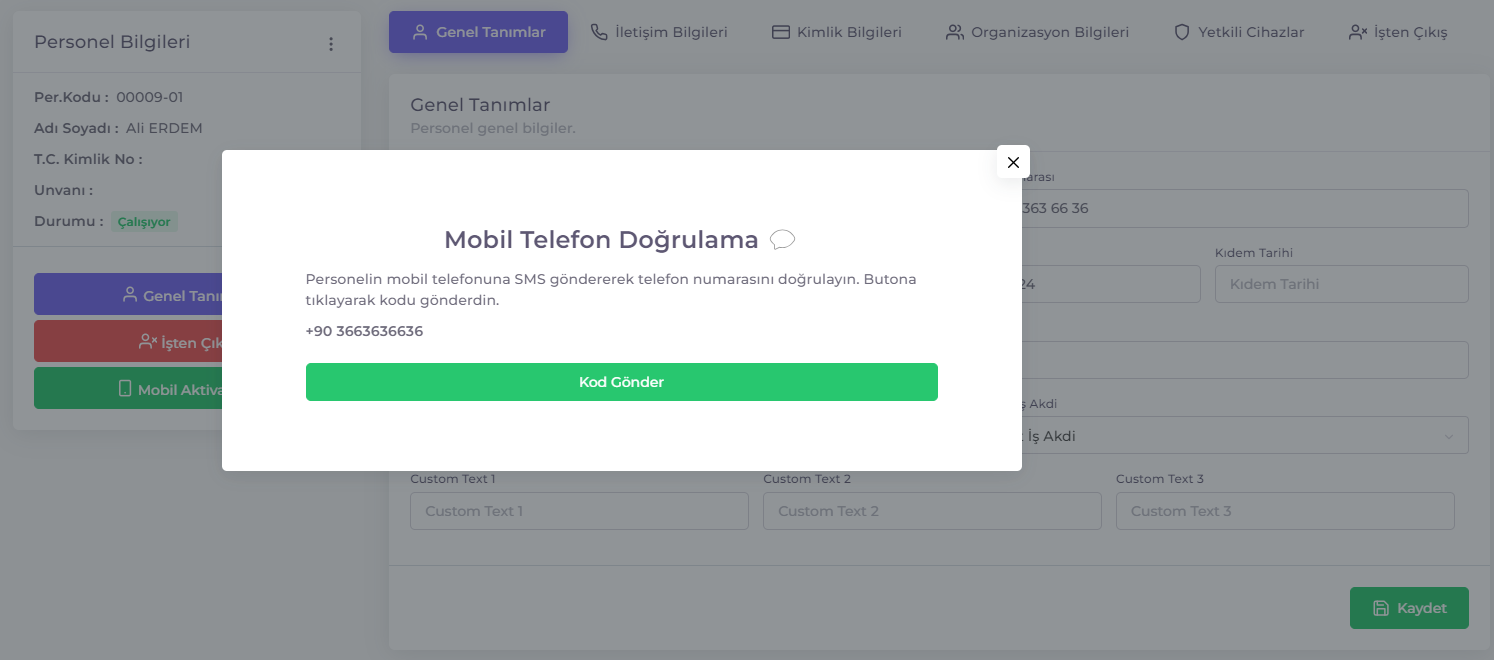
Activate Your Personnel
- Click on Personnel List menu.
- Click the
Editicon in theActionscolumn of the relevant Personnel row. - Perform mobile activation process by verifying the mobile phone number of the relevant personnel. Click the "Send Code" button to send an SMS to the personnel's mobile phone and get the verification code.
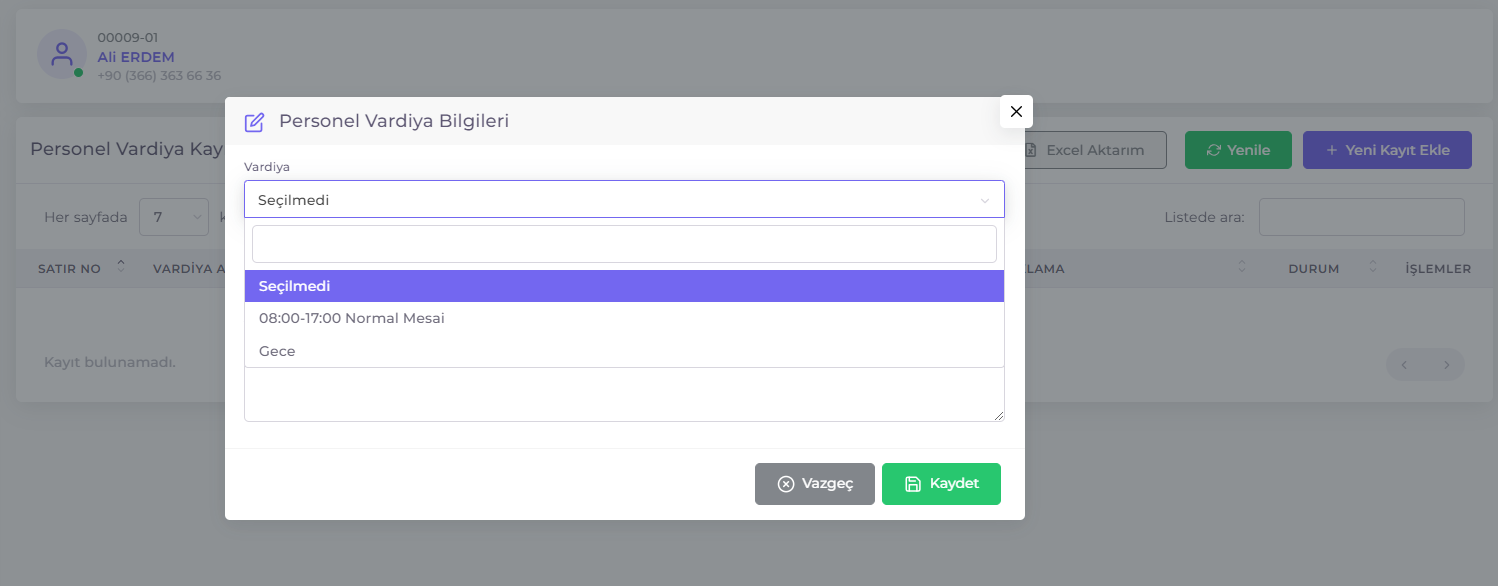
Assign Shifts to Your Personnel
- Click on Personnel List menu.
- Click the icon in the
Actionscolumn of the relevant Personnel row. - Click on
Shiftsfrom the menu that appears. - Assign shifts to the relevant personnel by entering the shift name and start date.
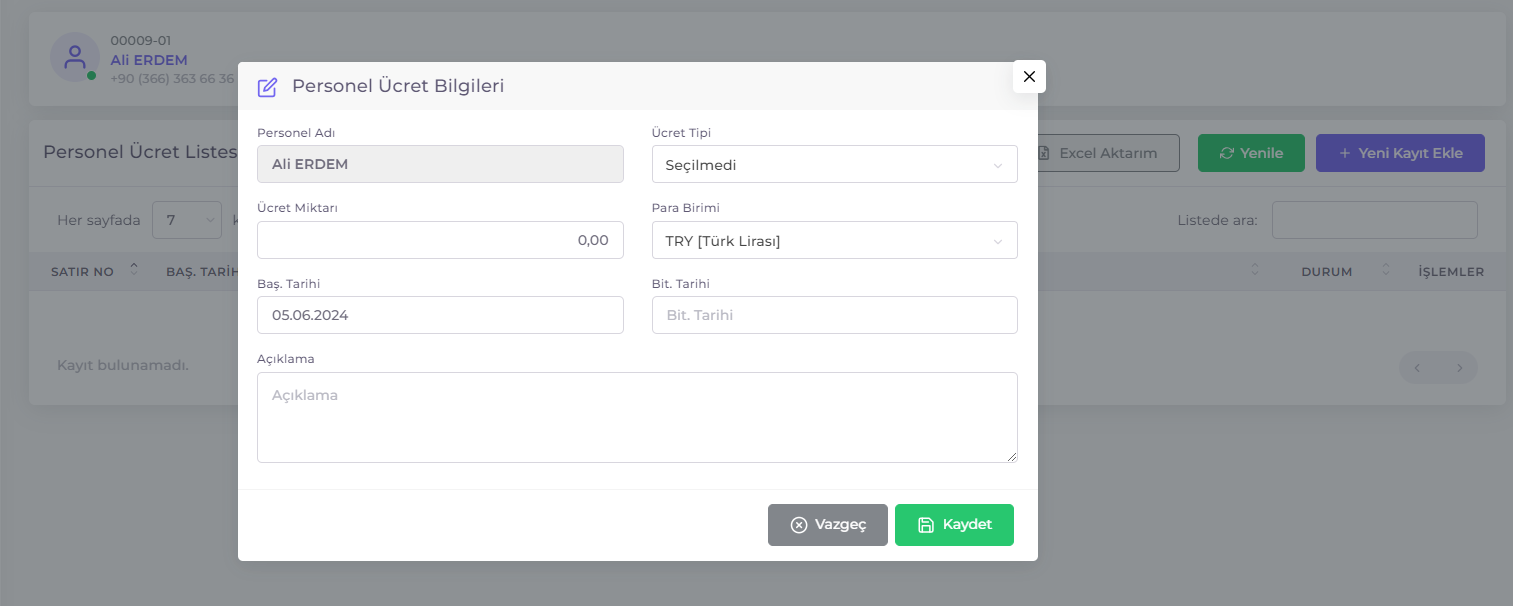
Enter Personnel Salaries (Optional)
- Click on Personnel List menu.
- Click the icon in the
Actionscolumn of the relevant Personnel row. - Click on
Salariesfrom the menu that appears. - Enter salary information by adding new records, editing existing records, or deleting them.
By following these steps, you can effectively use and manage our PMS application.
After completing these steps, you can efficiently manage your company's personnel management using our PMS application.